Exploration 101
Exploration is a hazard with a worse fate than Mining. Dying is more likely to leave you RRd than Miners. However, Exploration is partly the stations’ bread and butter as any objective you complete will distribute the same amount of points you’ve gotten to each department budget card in credits and can help make the station very, very rich. Here are some tips to help you survive another day.
Rule number 1, talk. Keep in touch with the RD, AI, Captain or any other contact person you’ve given an Exploration Radio Key to. Let them know what is going on, for example letting them know that you’re experiencing EMPs, Cultists or Xenomorphs is vital to ensure they can respond appropriately.
Before you’re setting off on your first missions you’ll want to complete some tasks. Typically you’ll want to finish these as quickly as possible so you can start with your missions and not do upgrades after the first or second mission.
Setting up the Shuttle
Recommended Equipment
Get your hardsuit, recharger and maybe vendor if your shuttle doesn’t already have one onto the shuttle.
You should ensure you request a Medibot from Robotics and keep it functional on the shuttle to not force you to become obese of Donk Pockets and give you a place of rest for when you’ve suffered injuries. The biggest risk of death is laziness when it comes keeping yourself healed up! And even if you’re an IPC, any VIP is not and would greatly appreciate a Medibot to patch them up in the event of any injuries.
For the shuttle you want to keep a beacon on it and or on your person for emergency rescue missions by the station. Instead of having to recall your shuttle or use any other shuttle they (most likely a Command member) can simply use the Hand Teleporter to give you direct access to you or your shuttle. Beacons can be printed in the Science techfab but requires T4 research and materials, you can find a free beacon typically at Xenoarch, Arrivals or Departures. Ensure your contact person are aware of this.
Engine
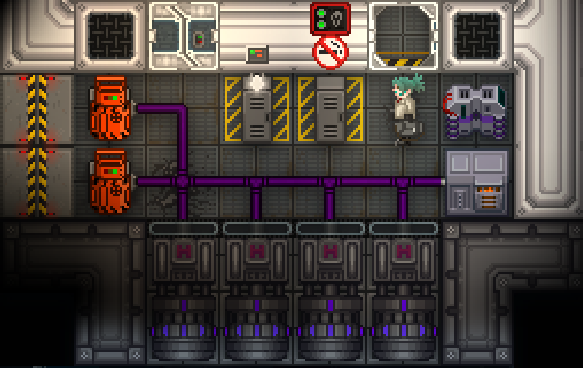
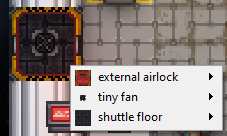
Firstly you’ll want to go to Toxins and request the required pipe parts or do it yourself if there is no one there, you do not need to bring the RPED to the shuttle. Turning on the pump and wrenching the plasma canister will fill the pipes as much as possible. It is highly recommended to NEVER allow these pipes to get damaged or unwrench them as it can compromise your ability to continue Exploring. When a canister is empty you can dump it into space. But when you are dumping a canister into space do be aware to use a door which has a Holofan or an Tiny Fan to prevent depressurizing the shuttle such as this door here.
Box Station
WIP.
Corg Station
WIP.
Delta Station
WIP.
Fland Station
WIP.
Kilo Station
WIP.
Meta Station
WIP.

You can find additional plasma canisters at Toxins, do ensure you leave at least two for toxins themselves.
The colour of the pipes and pump doesn’t matter, I’ve used the default colour grey for showing what I’ve changed or added.
Upgrades
For fuel management it is quite vital you upgrade your shuttle after T3 or T4 is available and the adequate resources to print them.
You may want to request a Ripley MK2 Exploration Mech from Robotics. A mech will trivialize many of the threats You can find how to operate a mech and details of the Exploration Mech here: Mechs and you!
Shuttle Flying
Flying
WIP.
Docking
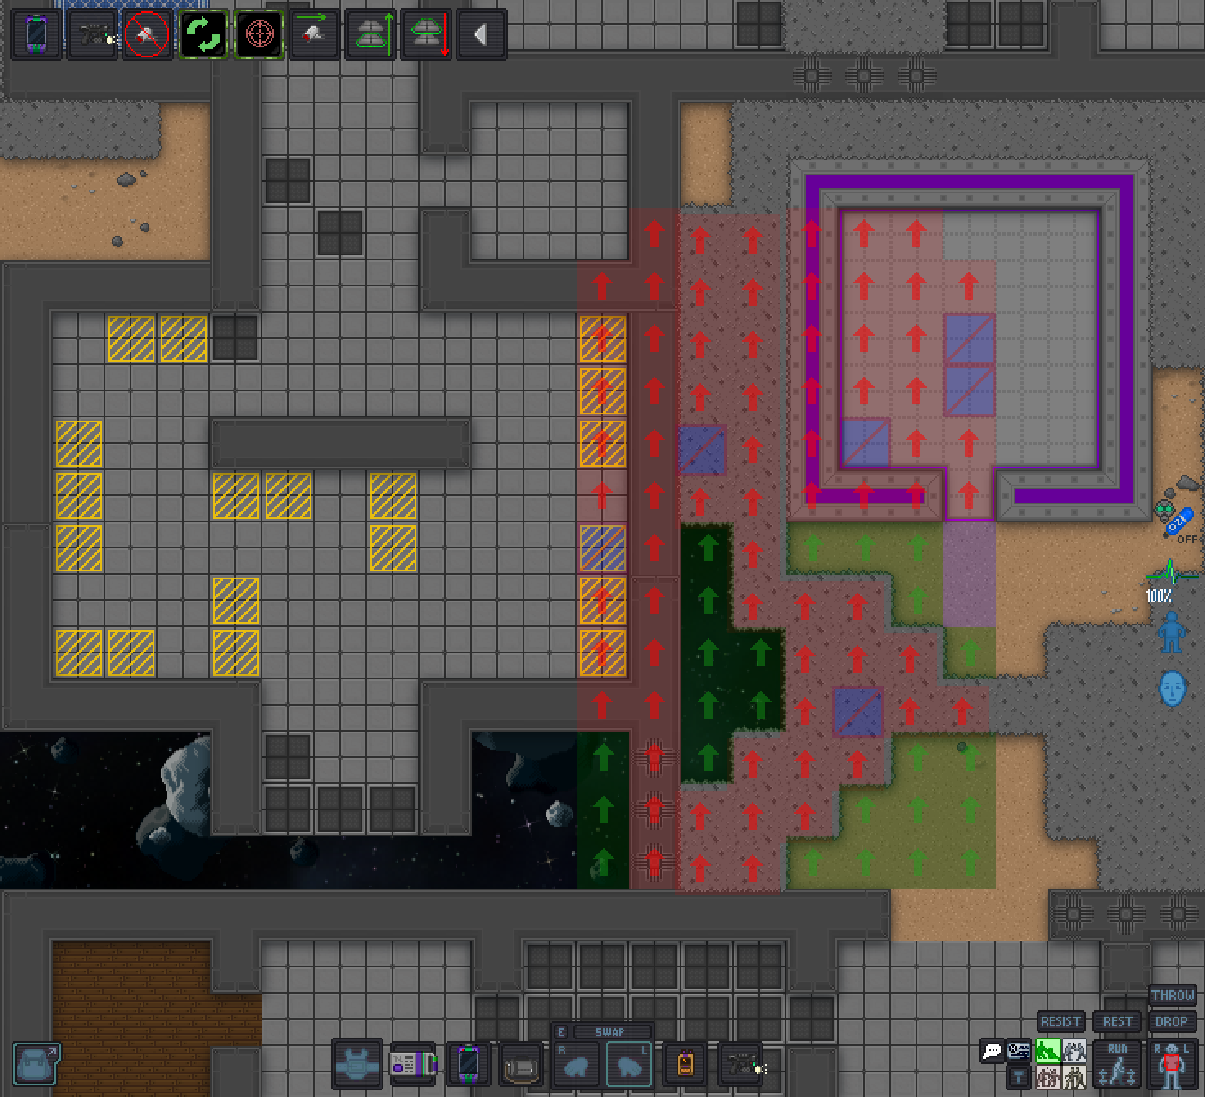
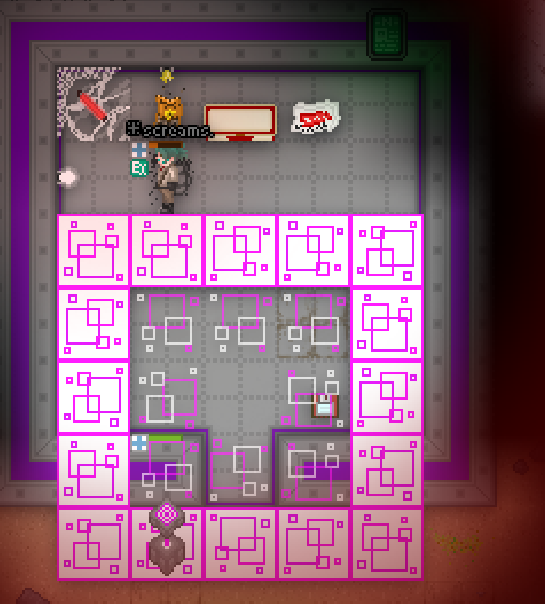
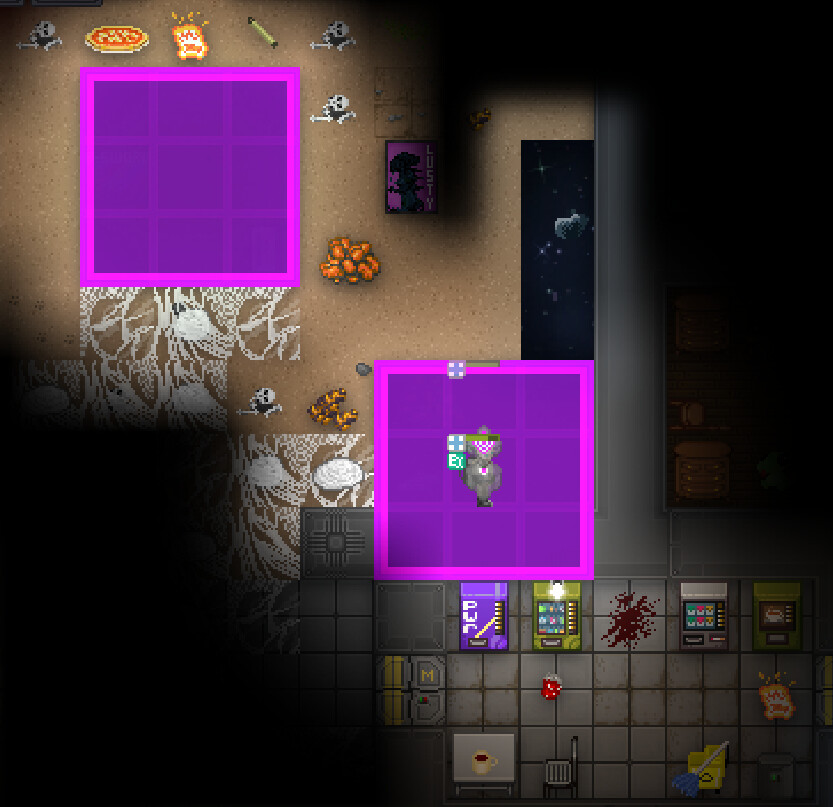
When docking you are able to get a general over view of various rooms and places of interest. Here for example you can see an EVA storage (left) and Pandora’s box room (right) along with multiple other less distinctive rooms and hallways.
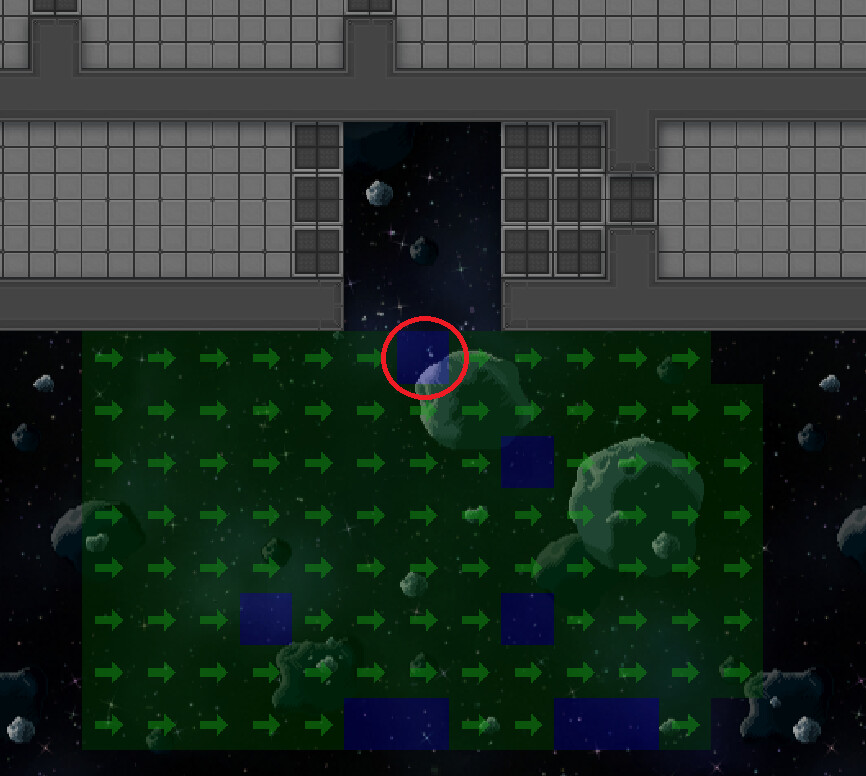
Primarily you will want to use the door with the tiny fan as your primary doorway and ensure it is easily utilized when you land. This door is always located in the center of your shuttle monitor, marked with a circle on the associated picture.
Derelict Station Dangers
No matter what you’re fighting or doing, you will want to bring one bruise pack and maybe one ointment, one recharger, your gun, your knife, and most importantly; your GPS. Do note that when not using your GPS, it can fit nicely into your shoes.
SPOILER ALERT, if you wish to discover and engage these dangers without being spoiled skip this section.
Xenomorph
Quite often will a station have been overrun by Xenomorph and in this state they are not too dangerous. Focus on taking them out one-by-one and ensuring you have a full clip before looking around will contribute to your survival.
Clock Cultists
By far the worst of them all, a station overrun by the Clock Cult will have multiple traps scattered all over the station with many strong and capable warriors.
Blood Cultists
I honestly don’t know much about blood cultist stations, I will update this after I’ve learnt more about them.
Towers
These are usually very harmless to carbon creatures but will disrupt your operation and especially the continued operation of IPCs through EMPs. There are three types of towers.
To counter these towers, you will want to use cutting laser mode on your gun and ensure your recharger is a few steps back from where you’re exploring to ensure you have a safe area to recharge in the event of an EMP.
Spiders
Probably the most underestimated of them all as while dealing low damage and being limited to melee range will paralyze you, cause you to drop your weapons and continuously bite you over and over again injecting even more poison. These injects will always go through hardsuits so range is your friend. While you are slowed down by their thick web, they on the contrary are not. Several of them can appear from the shadows and collectively overwhelm you with poison and make for a certain death.
To counter these spiders, ensure you have a bottle of charcoal pills on hand and you are properly healed. One bottle of pills is inside the Toxin kit in Toxins on the station or at Chemistry (who can provide you with advanced anti-toxin medicine). Additionally, ensure your weapon is charged and you have a backup knife readily available in your pocket and try to engage at range using doorways to funnel them.
Additional Threats
Pandora's Box
This work as a boss fight for many Explorers. It is a very simple boss who will die with one clip of your gun and a little bit more. They have several attacks.

So You’re a Power Gamer and Want to do Exploration Without People?
First of all you want to go over to here and download the repo.
Next up you want to open said repo and look for a “BUILD.bat”, click it and wait for a quite.

It’ll look something like this.
Next up open Byond and press [CTRL] + [D].
Set the file to where your beestation.dmb inside the repo and set Security to Trusted.

It’ll look like this.
Then press the green “GO” button which turn into a yellow arrow. Now wait a bit and then press the yellow arrow and viola! The game will start up and you can do whatever you want. Go Explore for 10 hours! Or… simply spawn them in. Up to you.
Made with slight anger.
I’m not an Power Gamer but I Want to Explore!
You’re in luck. Here are some advice for interacting with the station more.
If it is high-pop you could ask the RD or someone else to assist you, perhaps you have a lot of power gaming loot you want taken of your hands. Ask a Cargo Technician, an Assistant or even the RD themselves to assist with distributing everything.
Many Miners would usually be happy to accompany you in your explorations as most stations are encased by large asteroids. Especially if you can easily grant them access to and from the shuttle and a space for their ORM and vendor.
Exploration can get lonely too. You can ask an Engineer to hook you up with Common comms on your relay so you can finally talk to everyone on the station!
Things Different Departments or People Want from Exploration
This can be tricky to learn but will make people appreciate you and know you exist.
Medbay - Bloodbags, Medkits (filled), O2 canister (one or two), Experimental Cloner.
Chemistry - Suspicious Pills.
Robotics - Medkits (empty/filled), Health Scanners, O- Bloodbag (one or two), iron, glass, plasteel, cyborg upgrades, bot components (beepsky and such).
Science - Spare Techfab Board (for the RD)
Xenoarch - Artifacts, Strange Objects.
Janitorial - Rapid Light Dispenser
Security - Combat Shoes, Combat Gloves, Advanced Camera Console, Hand Cuffs, Mind Shields, weapons, contraband, donuts.
Engineering - Industrial RCD, Rapid Light Dispenser.
Xenobiology - Monkey cubes, slime cores.
Chapel - Monkey cubes.
Kitchen - Monkey cubes, Meat locker, Food locker (both found in kitchen).
Supply - Abandoned crates, empty crates.
Mining - Any ore.
Additional things of interests may be Pandora’s pizza box, different bed sheets, all the plushies, and transparent PDA. These could be sold to a retailer or with a vendor.
Now this is a lot of things. Though, don’t worry about your back. Simply request a Ripley with a Hydraulic Clamp and now you can carry all those crates of things and deliver them all over the station without breaking your spine! And remember, you don’t need to simply leave this in a giant pile, you can surely sell it to a reseller. People like @PinkSuzuki I am sure would love to set up a shop selling various artifacts and weapons.
This is an overall encouragement for all Explorers to quit hoarding stuff for yourself.